Custom fields can be used to store additional information for absence entries.
Using input rights and editing rights for custom fields, you can define whether Employee users and Supervisors are allowed to enter and edit custom fields for absence entries. Admins can always enter and edit all custom fields.
Edit Custom Fields in an Existing Absence Entry
Depending on the status of the absence entry, there are two ways to edit custom fields.
Edit the Entire Absence Entry
If the absence entry is in a status that allows editing:
- Open the absence entry.
- Click Edit.
- In the edit form, update:
- The standard fields (for example Start date, End date)
- The additional fields
- Click Save.
Edit Only the Custom Fields
If the absence entry can no longer be edited (for example, an approved vacation request with Approval required), you can edit the custom fields separately.
- Open the Detail view of the absence entry.
- Click Edit additional fields.
- Update the required fields.
- Click Save.
Open the Detail View of an Absence Entry
There are two ways to open the Detail view.
Via the Calendar view
- Open a Calendar view.
- Click the desired absence entry in the calendar.
Via the List view
-
Employee users
- Log in to your Timebutler account.
- Go to Absences > List view.
- Click the blue magnifying glass icon next to the desired entry.
-
Supervisors and Admins
- Log in to your Timebutler account.
- Go to Employees > Absences > List view.
- Click the blue magnifying glass icon next to the desired entry.
Add or Edit Custom Fields
- Log in as an Admin.
- Go to Settings > More… > Additional entry fields for absence types.
- For the desired absence type, click Edit custom fields.
- Add new custom fields or change existing ones.
- Click Save.
Delete Custom Fields
- Log in as an Admin.
- Go to Settings > More… > Additional entry fields for absence types.
- For the desired absence type, click Edit additional entry fields.
- Click the red trash can icon next to the custom field you want to delete.
If the custom field is already used in existing absence entries, it cannot be deleted. This ensures that the existing data remains correctly assigned.
Instead of deleting the field, set it to Inactive. This means:
- The field remains available for existing absence entries.
- The stored data is preserved.
- The field is no longer shown when creating new absence entries.
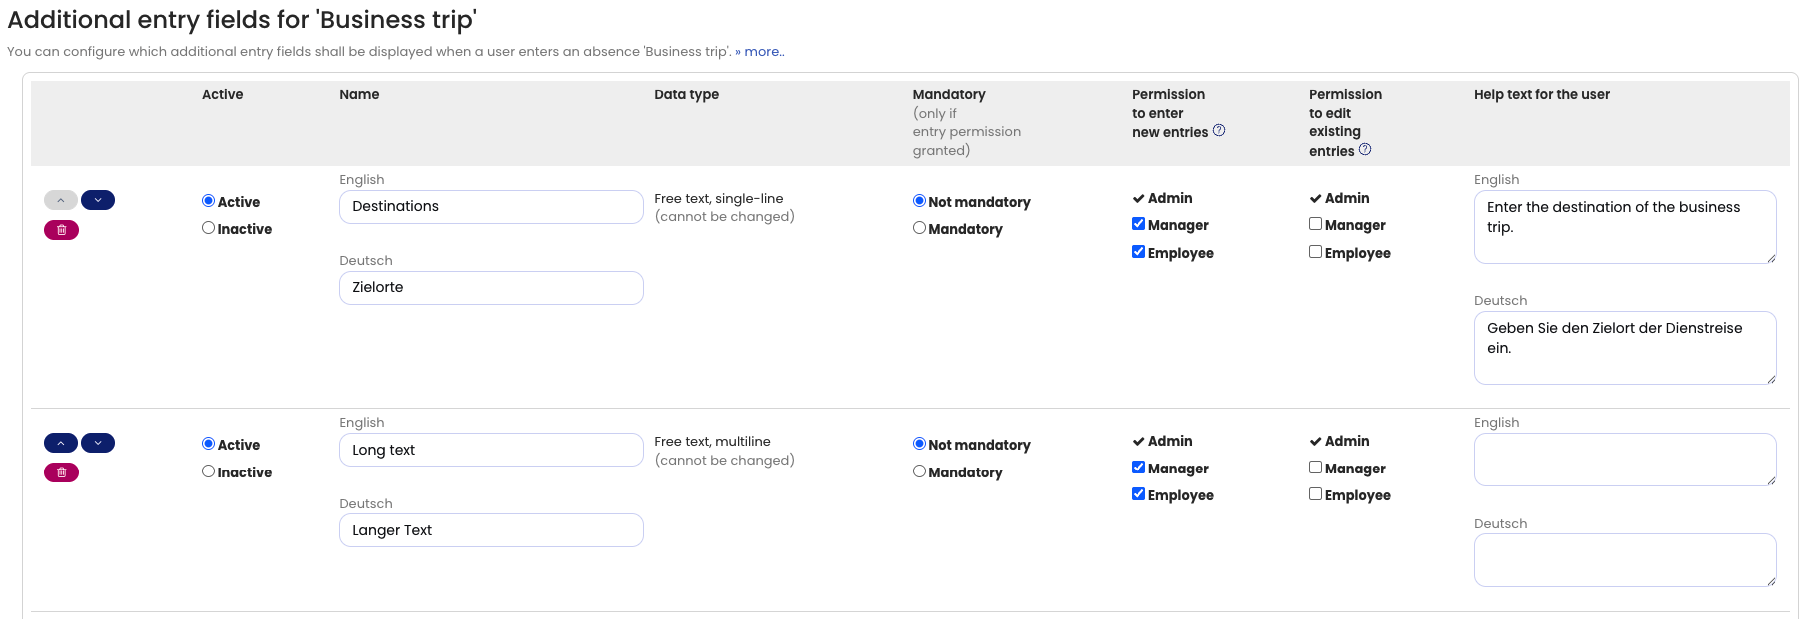
Screenshot: Edit custom fields for absence types