There are several ways to create a new absence entry in Timebutler. The available options depend on the user role and the preferred workflow.
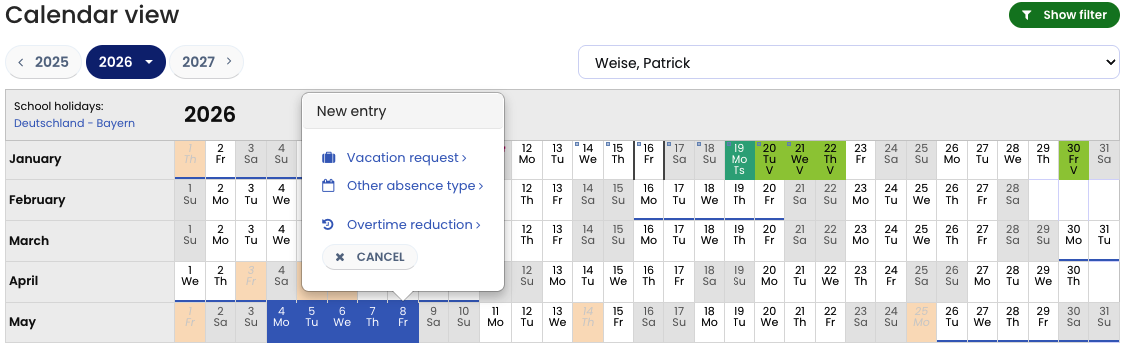
Creating an Absence via the Calendar
Employee users
- Log in to Timebutler.
- Click “Absences > Calendar View” in the left-hand navigation.
- Click on the first day of the absence.
- Click on the last day of the absence.
- A small selection window appears.
- Click “Other absence.”
- The absence entry form opens, where you can edit the details and save the entry.
Supervisors and admins
- Log in to Timebutler.
- Click “Employees > Absences > Calendar View” in the top-left navigation.
- In the row of the relevant employee, click on the first day of the absence.
- Click on the last day of the absence.
- A small selection window appears.
- Click “Other absence.”
- The absence entry form opens, where you can edit the details and save the entry.
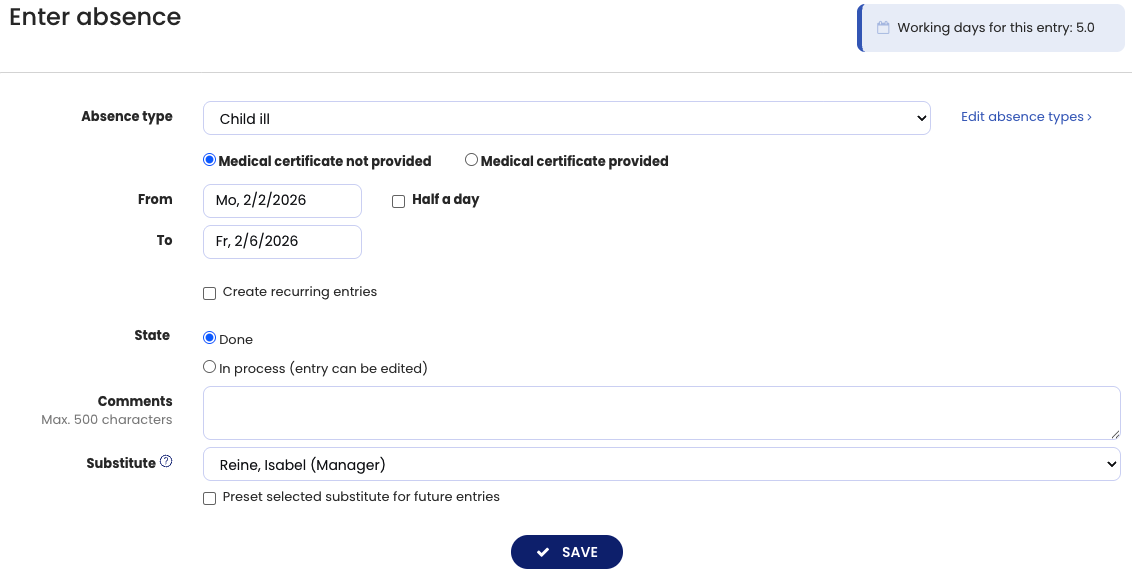
Enter absence via the entry form
Employee users
- Log in to Timebutler.
- Click “Absences > Create absence.”
- The absence entry form opens.
Supervisors and admins
- Log in to Timebutler.
- Click “Employees > Absences > Create absence.”
- The absence entry form opens.
Additional Options
-
Absence entries can also be created as recurring entry, for example when planning home office every Tuesday and Thursday over the next two months.
-
Admins can create absence entries for all employees or multiple employees at once using bulk request.
-
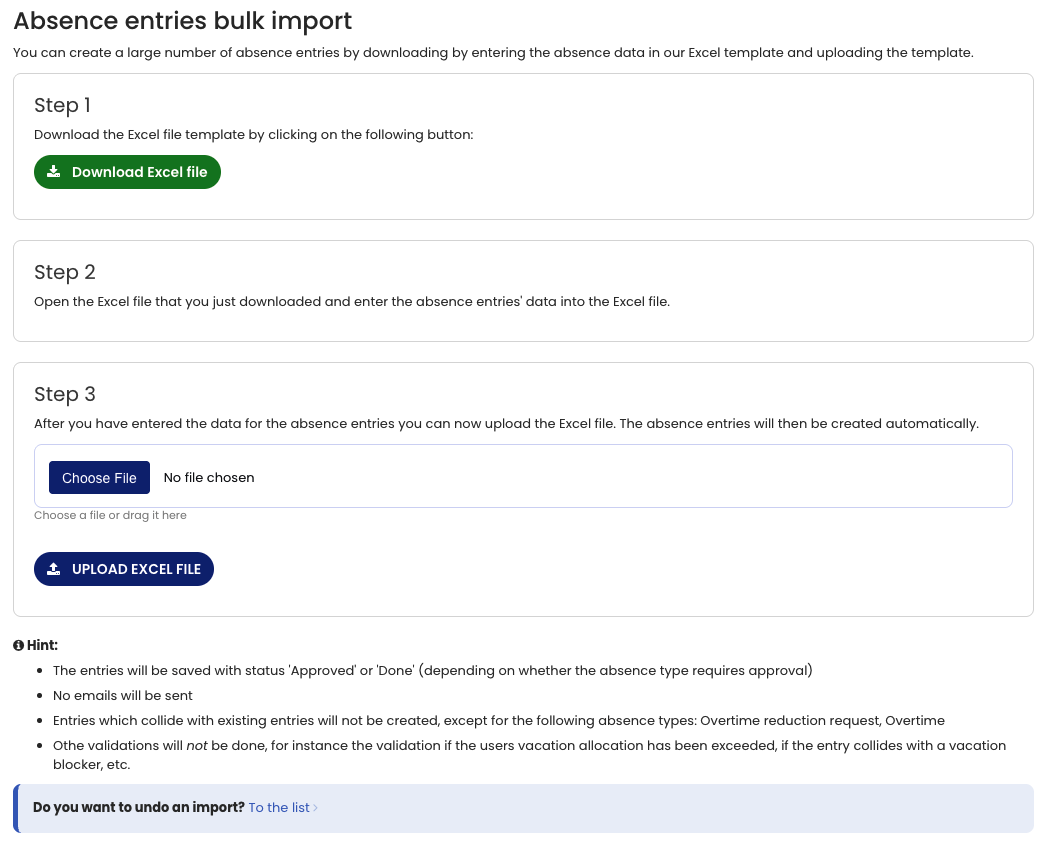
Absence entries can also be added via bulk import, which is especially useful when switching to Timebutler for the first time.
Screenshot: Enter absence via the calendar
Screenshot: Enter absence via the entry form
Screenshot: Bulk import of absence entries