
You have successfully set up Timebutler!
Your employees have received their login credentials and can sign in to Timebutler. As an admin, you have an overview of all employees and can continue to configure settings and create user accounts in the future.
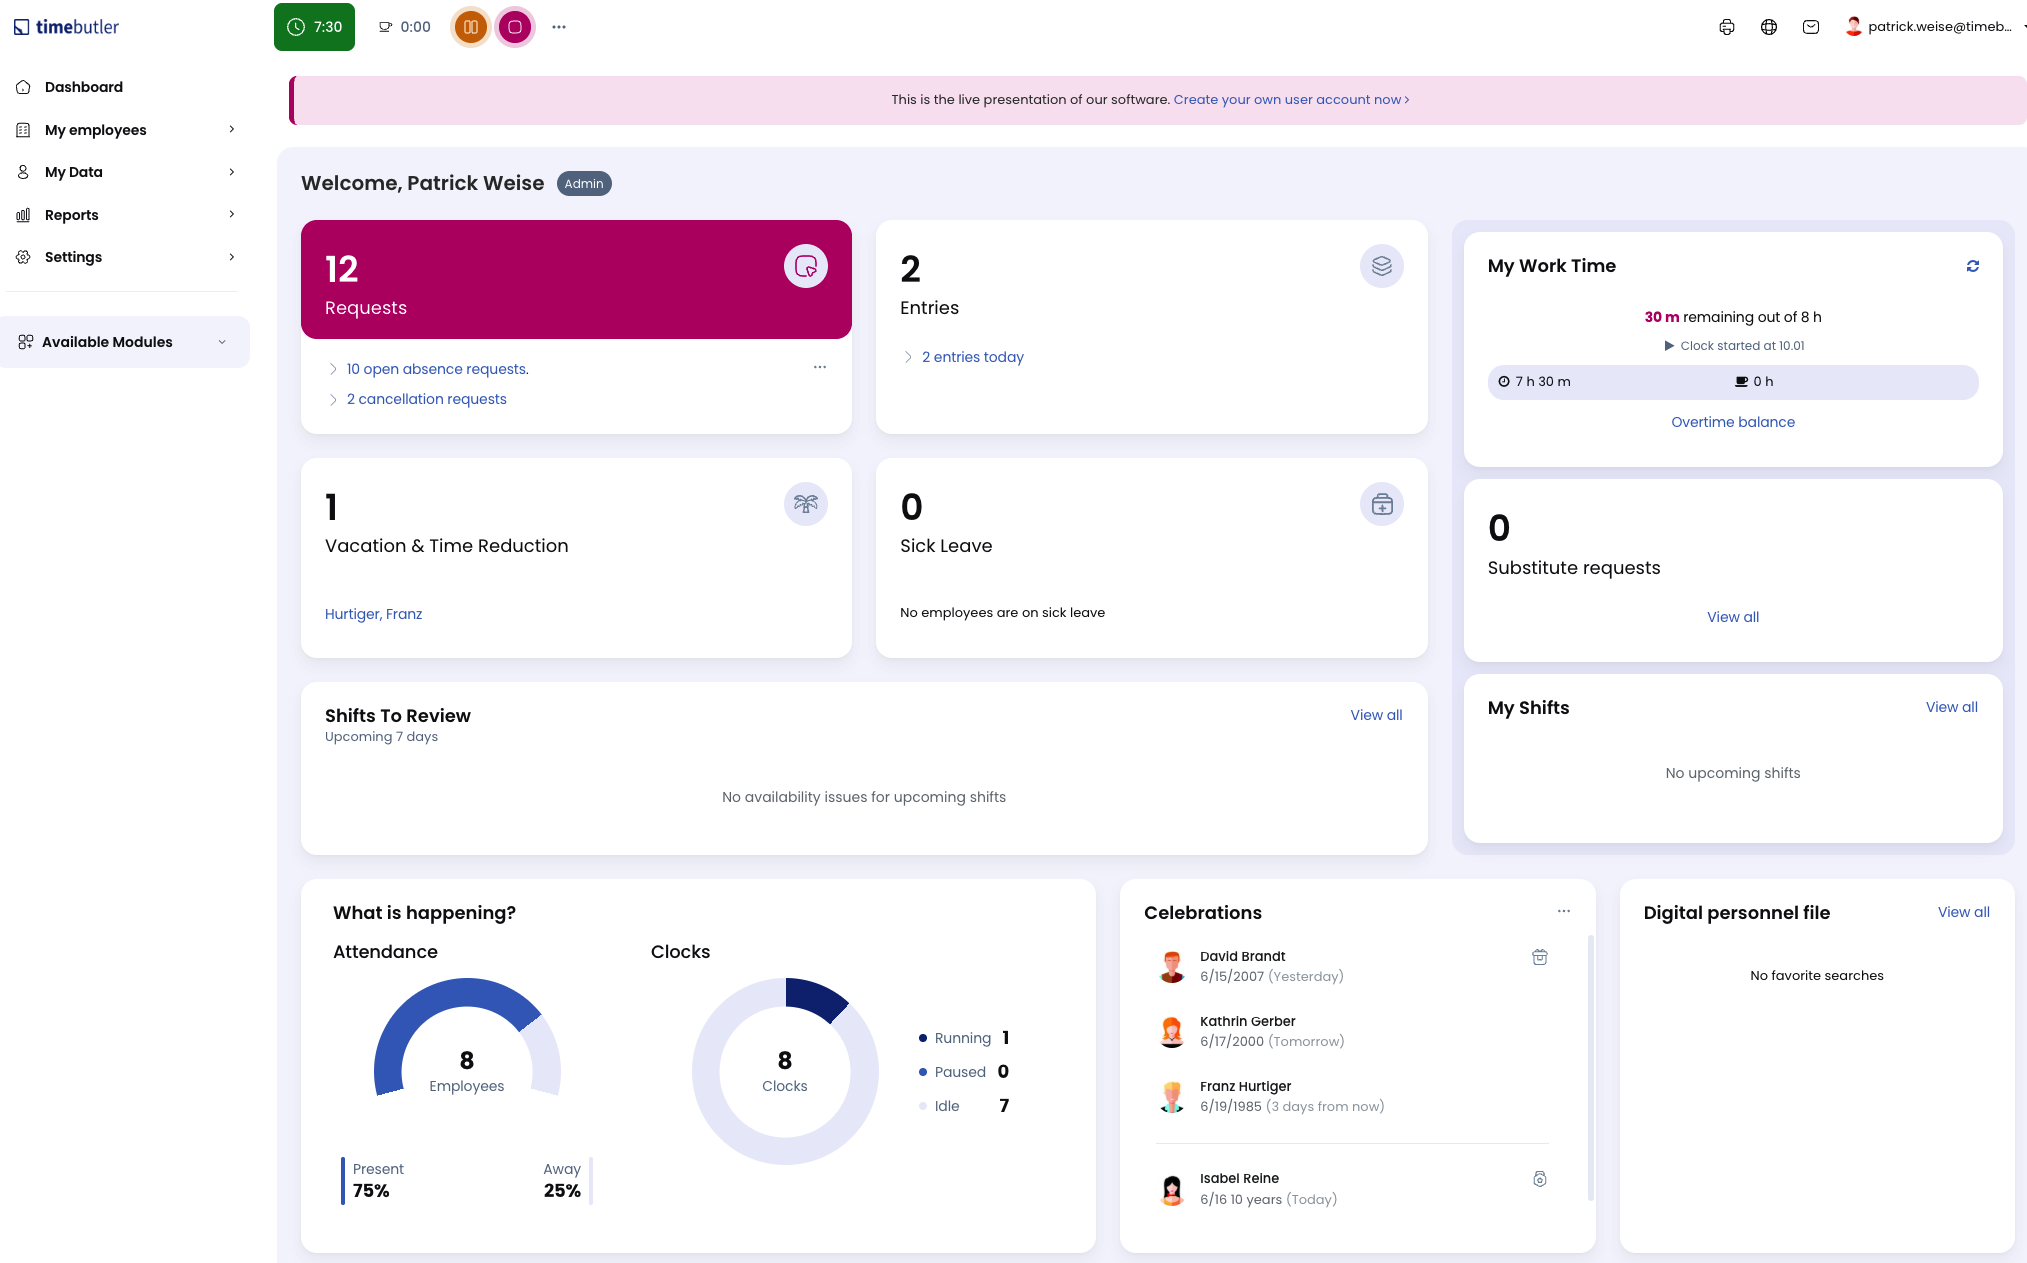
Dashboard
Right after signing in to your Timebutler user account, you land on the dashboard - your cockpit with a clear display of all relevant information on one page.
On the dashboard, you get information about pending requests, employees who are present and absent, upcoming birthdays and company anniversaries, your working time status (only if the time tracking feature is enabled), and much more.
You can click most sections to get more information.
You can return to the dashboard from any page in Timebutler by clicking the area with the logo at the top left.
Navigation
The left navigation bar always gives you access to all Timebutler functions, divided into four areas:
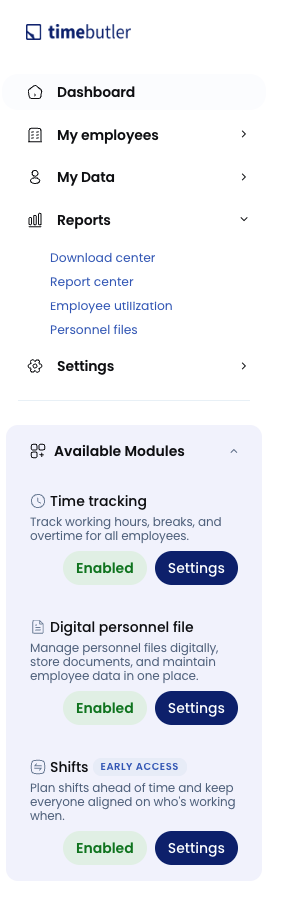
My Employees
In the My Employees area, you find all functions and information about all employees in the company. You can open the calendar view for employees, approve or reject pending requests, enter new absences, view working times, and much more.
My Data
In this area, you can view your own data: your vacation balance, your absences, your working times, etc.
Reports
In this area, you can access reports and analyses.
Settings
In this area, you find various settings to tailor Timebutler to your needs and make changes to employee settings.