How an absence entry can be deleted depends on the user role (employee, supervisor, or admin) and on the system settings configured by an admin.
Deleting an Absence Entry: Employee Users
Employee users cannot delete absence entries directly. Instead, deleting an entry triggers a cancellation request that must be approved by a supervisor.
When an employee submits a cancellation request:
- A cancellation request email is sent to the supervisor.
- The supervisor can approve the request.
- Once approved, the absence entry is deleted.
- The employee is notified by email after the deletion.
Creating a Cancellation Request
Employee users can create a cancellation request in one of the following ways:
Via List View
- Log in to Timebutler.
- Click “Absences > List View” in the left-hand menu.
- Click the red trash can icon next to the absence entry you want to delete.
Via Calendar View
- Click “Absences > Calendar View” in the left-hand menu.
- Click the relevant absence entry in the calendar.
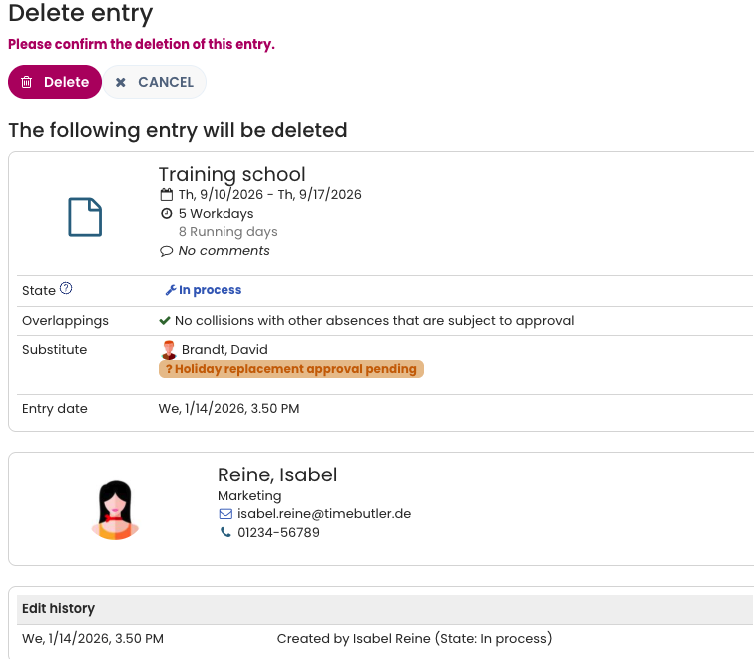
- Click the red “Delete” button on the entry details page.
Deleting an Absence Entry: Supervisors and Admins
Supervisors and admins can delete absence entries directly without submitting a cancellation request.
Via List View
- Log in to Timebutler.
- Navigate to “Employees > Absences > List View” in the top-left menu.
- Click the red trash can icon next to the absence entry you want to delete.
To find entries more quickly, the list can be filtered using the green “Filter” button in the top-right corner of the page.
Via Calendar View
- Navigate to “Employees > Absences > Calendar View.”
- Click the relevant absence entry in the calendar.
- Click the red “Delete” button on the entry details page.
Delete recurring entries
Instructions for deleting recurring absence entries are available in a separate help article: Delete recurring entries
Allowing Users to Edit or Delete Absence Entries
Admins can define editing and deletion permissions separately for each absence type (for example, training or home office).
This allows admins to:
- Specify when users are allowed to edit or delete their own absence entries.
- Allow certain absence types (such as home office) to be edited or deleted by employees without submitting a cancellation request to a supervisor.
These permissions can be configured by adjusting the editing and deletion rights for absence entries.
Allowing Deletion of Future Absence Entries
Admins can also configure whether users are allowed to delete their own future absence entries without submitting a cancellation request.
To enable this option:
- Log in as an admin.
- Click “Settings” in the lower-left corner.
- Select “More…”.
- Click “Global Settings” in the upper-right corner.
- Enable the option “Delete own future entries.”
Screenshot: Delete absence entries