
Before you can split a time entry, an admin needs to turn the feature on. Log in to Timebutler as an Admin, go to Settings > More… > Time Tracking, and enable Allow splitting entries onto projects.
Once splitting is enabled, existing time entries can be assigned to one or more projects after the fact. Log in to Timebutler and click Time Tracking > List view on the left. On the time entry you want, click the Split button.

Now enter working time and break time in Split 1 and Split 2. If you want to split the entry into more than two parts, click Add split and fill in the additional fields.
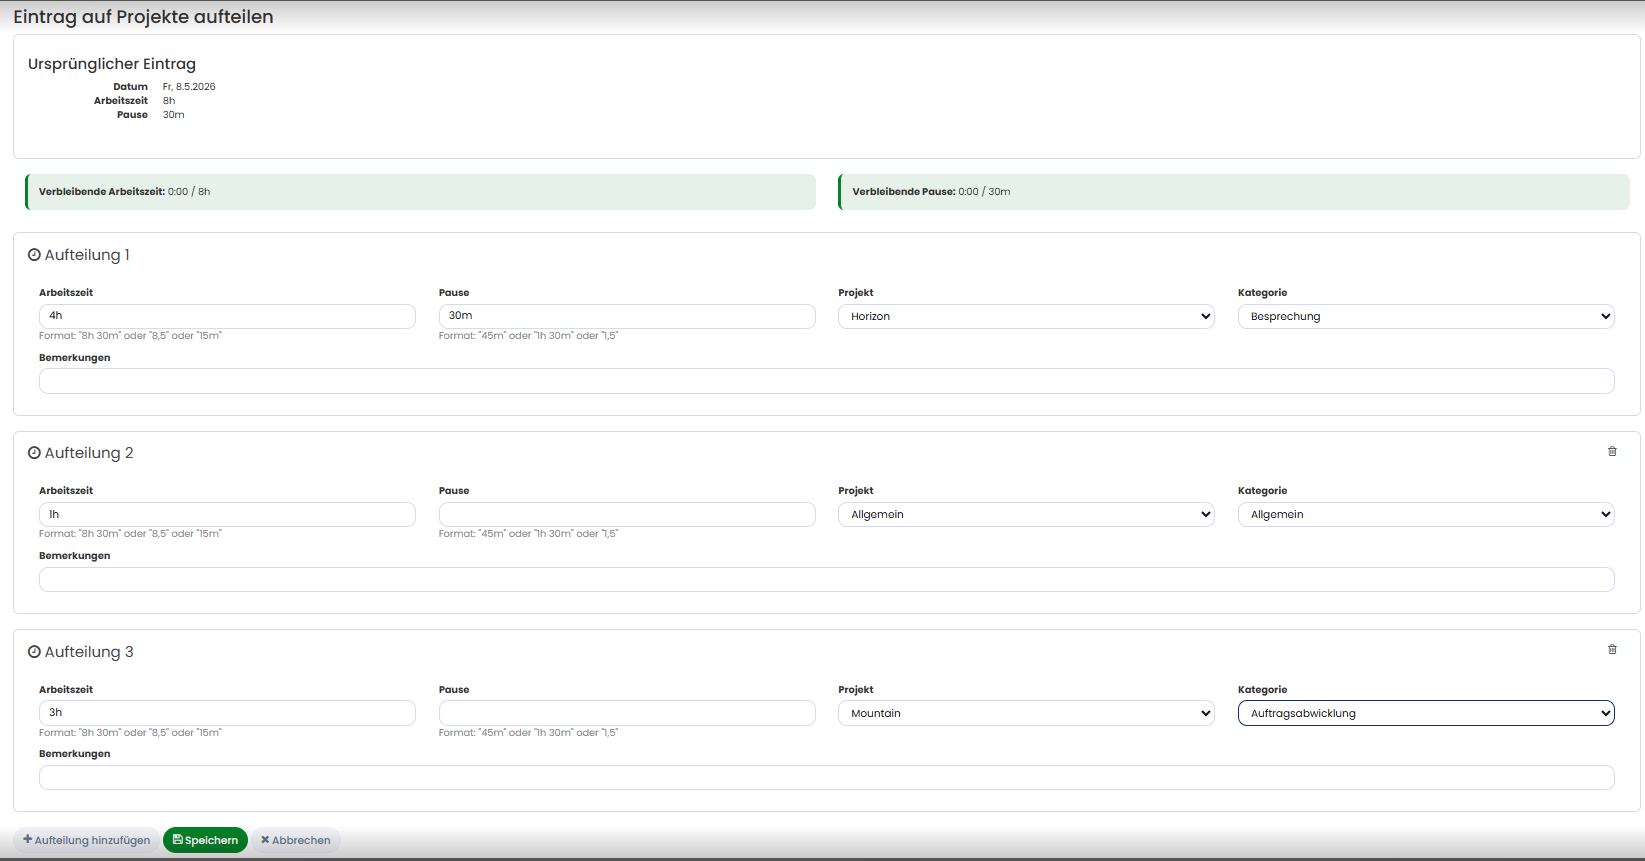
Whether approval is required for splits is set the same way: as an Admin, go to Settings > More… > Time Tracking and select Splits require approval.
If splitting requires approval, the assigned manager receives the corresponding requests and can approve or reject them. They can see the current approval status of each split at any time.